Why is it Important for Kids to Create and Construct Things?
Building your own projects whether it’s a homemade walking sticks, grass head, tree fort, or bird feeder, creating something out of nothing gives one an immense sense of accomplishment, confidence, self-satisfaction, and joy. There is nothing better than ‘owning’ a project that challenges our skills. Sure, there can be a bit of frustration along the way, but at the end of the project the sense of pride and accomplishment is worth every bit of problem solving agony. Let your kid’s imagination roam, build their math skills, and engage in a little creative problem-solving. They can do it!
Note: Some of these construction activities may require a bit more in the way of tools, adult assistance/supervision, and planning than the average craft for kids, but I challenge you to step back and see what your kids can do. Let them surprise themselves. (And maybe even you–but then again, you knew they could do it all along, didn’t you?)
Enjoy!
These activities are just the beginning. There are more construction craft activities on the blog as well as Pinterest. And sometimes I share activities on Twitter, too! Oh! And be sure to check out the book I wrote, too. It includes over 1,000 play activities so no matter where you are and what your interests or age, there is something in there for you–guaranteed! Check it out!
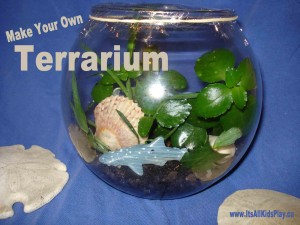
Terrarium
 A terrarium is a small, closed container for plants.
Materials needed to make your own terrarium: jar with lid, potting soil, plants, water.
Take a clear jar—the wider the better. Place about 5cm (2 inches) of soil in the bottom of the jar. Plant seeds or cuttings of houseplants in your terrarium. (Depending upon the plant, you might be able to place the cutting straight into the soil or you may have to place it in water until roots start to grow before you plant  it.) Water your plants or seeds. Then place a lid on the jar. If you do not have a lid, plastic wrap or a small plate will work nicely.
In time, the plants will grow. Because they are in a sealed jar, they will need to be watered only once or twice a year. If it gets really wet and mildewy in the jar, you may have to remove the lid for a day or two to let it dry out a little bit. Essentially, you are creating your own little atmosphere.
Start Your Own Plant from a Seed or Cutting
Some plants need to grow roots in a glass of water from the piece you’ve cut off the momma plant, while others don’t. Experiment if you don’t know. See what works.
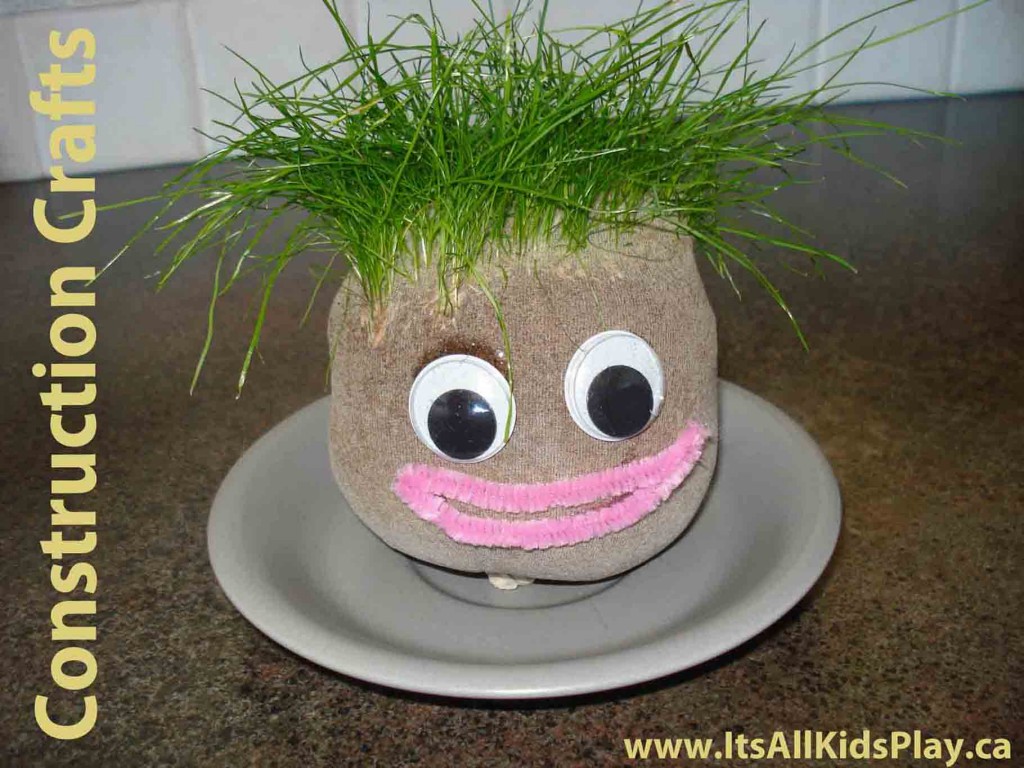
Grass Head
Materials needed to make a homemade grass head:
An old knee-high stocking (or the leg cut off of an old pair of nylons)
15 mL (1 tablespoon) grass seed
750 mL (3 cups) sawdust or peat moss
Bowl
Saucer or plate
Water
Markers, white glue, googly eyes
How to make a grass head: Place grass seed in the toe of the stocking. Fill the foot of the stocking with sawdust or peat moss. Add just enough to make a nice round ‘head’. Make sure you don’t mix the grass seed into the stocking too much. Tie a knot in the stocking right above the level of sawdust/peat moss. You may have to squeeze the material down to make a tight round ball.
Soak your grass head in a bowl of water for 2-3 minutes, then place it on a saucer or plate so it doesn’t drip everywhere. Once the head is dried out (about a day) you can give your grass head a face with markers. If you have googly eyes, glue them on.
HINTS: Keep your grass head on a plate or saucer and in the sun, but don’t let him get too dry. To keep him damp, dip the top of his head (the toe of the stocking where the seeds are) in water every day. In about a week, hair (grass) should start sprouting. Once it starts growing you can give him funky haircuts! Don’t forget to keep watering him!
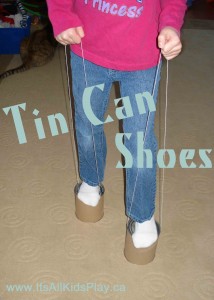
Tin Can Shoes
 Materials needed to make tin can shoes: 2 large coffee cans, 2 pieces of long, tough string or cord (over 1 metre (3 feet) long for each one), something sharp to make holes in the cans (a nail carefully hammered through the can works well), and an adult to help out.
How to make tin can shoes: Have an adult make two small holes, one on either side of the can, opposite of each other. Make the holes as close to the can bottoms as possible. Thread the long string through the holes and tie the ends together, making a large loop. The string loop needs to be long enough that your child can hold onto it while standing on the can’s bottom. Do the same with the other can.
 Turn the cans upside down and carefully place your feet on the can bottoms. Hold onto the strings and pull up lightly to keep the cans tight to your feet as you walk.
HINT: Smaller kids can use smaller cans.
Make Your Own Time Capsule
A time capsule is a container filled with things to be opened in the future. Some are opened in a year; some aren’t opened for 100 years! When do you want to open your time capsule?
Choose a container with a lid to be your time capsule. Shoe boxes or ice-cream pails make good time-capsule containers.
What would be interesting to put in your time capsule? You can put toys, a letter to yourself in the future, a newspaper from today and other mementos in your time capsule. (I don’t recommend putting things that will go bad like food or something that you will miss–like a favourite toy–in the time capsule. Close your time capsule and write on the lid when you want to open it.
Now wait… it’s hard, isn’t it?
Make a Cardboard Box Car/Truck/Submarine
How do you make a cardboard box car or submarine? It’s easy!
Using a large cardboard box and a little imagination you can build yourself a vehicle (oh, okay… you could make a cool fort too if you really want to). If you need a bigger vehicle (box), you can tape two boxes together. For example, add a smaller box to the top of a large box to make a submarine.
To make your box look like a car or boat, draw or paint the outside. You can also use paper plates or aluminum pie plates to make a steering wheel or wheels. Smaller plates taped or glued onto the front of the box will make great headlights. What else can you use? Pie plates? Stickers?
And how about doors? Ask an adult to cut out doors for you. If they don’t cut them all the way out, you can make them into flaps (doors) that can open and close. If you want to be able to drive your car around, make holes in the bottom of the box for your legs to stick out. Lift the box and drive (walk)! If you want to get extra fancy–staple strips of fabric to your car to make straps to go over your shoulder to keep your car up while you steer.
Build a Project from Your Imagination
Use scrap wood (sometimes lumber stores have bits and ends you can have for free!!!). Nail or glue the pieces together to make something interesting.
Homemade Puppets
How to make your own puppets:
Paper Bag Puppets: You can create a simple puppet out of a paper lunch bag. Where the bottom of the bag folds, create a face. The fold will be the mouth of your puppet. Colour, paint or glue things to the bag to give your puppet a face and hair.
Sock Puppets: Take an old sock that you can fit your hand into. The toe of the sock will be the mouth and nose area of the puppet. Glue or sew scrap material to the sock to make a mouth, nose, and eyes. You can also sew buttons on for eyes, glue yarn or string on to the top for hair.
Finger Puppets: Take a piece of cardboard and cut it out into the shape of a person or an animal, but don’t give it legs, just a head, arms and body. Your fingers will become the puppet’s legs. To do this, cut holes in the bottom of the puppet for your fingers to fit through. Decorate! If you would like a template (something you can print off and cut out) look for ‘finger puppet templates’ on the Internet or in a puppet book.
Paper Mache Recipe
There are many things you can make out of paper mache. You can make animals, shapes, piñatas, in fact, just about anything you can think of! Decide what you would like to make and prepare a ‘structure’ out of wire, cardboard, or a balloon to lay your paper mache over.
Materials needed to make paper mache:
Strips of newspaper about 3 cm (1 inch) wide and strips of white paper for the last layer.
Bucket and spoon
A mold for paper macheing (like a balloon, cardboard or wire structure)
250 mL (1 cup) of flour
30 mL (2 tablespoons) of salt
250 mL (1 cup) of warm water
Mix together: flour, salt and warm water. Stir.
Place plastic or newspaper where you are going to work as this can get messy. Dip your newspaper strips into the mix and wipe the extra mixture off by running the strip through your fingers. Place about 4 layers of strips on your balloon, cardboard, or wire. Allow the layers to dry (this may take hours or days) before adding 4 more layers. Keep adding layers until you have the shape and strength you need. With the last layer, use white paper (or paper towel) instead of newspaper strips. When it is dry, you can paint it and decorate it however you like.
HINT: If you have to wait for layers to dry, but still have mix left, seal it with plastic wrap. Stir it before reusing it. It may turn light brown, but it will still work.
Piñata
A piñata is a paper mache creation that holds candy or other treats. A piñata is hung up high and children use a stick to swing at it and try to break it open. Using paper mache (see above), you can make your own piñata.
How to make your own piñata: When making a piñata make sure you create your piñata’s structure with a balloon instead of cardboard or wire so it will break open easily–use the directions in the paper mache activity above with a few modifications listed below:
Once you have dried 2 layers over the blown up balloon, cut a small hole in the bottom of the piñata. Pop the balloon if it hasn’t popped already. Fill the inside where the balloon was with treats. Place the piece that was cut out of the piñata back over the hole and tape or paper mache it back into place. Wrap a long loop of yarn or tough cord all the way around your piñata, leaving a loop at the top so you can hang your piñata when it is ready to break open. By wrapping it under the piñata it will be stronger and not come unattached the first time someone hits it.
Add more layers to the piñata in order to make it stronger. When it is dry, decorate it with paint, sparkles, tissue paper, ribbons–whatever you like! But remember, it’s going to be destroyed!
Easy Homemade Clay Recipe... Sculpt!
Ingredients needed:
250 mL (1 cup) flour
75 mL (1/3 cup) warm water
60 mL (1/4 cup) salt
Bowl
Spoon
Baking sheet
Food colouring (for coloured clay)
Mix the ingredients together in a bowl. (If the dough is too dry add more water.) Voila! You have homemade clay!
Create a hand print or shape something from the clay.
Have an adult bake your creation at 65 C (150F) for 1-2 hours on a cookie sheet. Once your creation has cooled, you can paint it.
Sidewalk chalk
Make your own sidewalk chalk using these ingredients:
250 mL (1 cup) water
250 mL (1 cup) Plaster of Paris
molds (empty toilet paper rolls or other small round containers)
powdered tempura paint (available in most craft stores)
spoon
bowl
Mix water and plaster together. Mix in the tempura paint powder to add colour. You can make swirl coloured chalk by using different colours and by mixing them just slightly. Let the coloured mixture sit for one minute, then pour it into your molds. (If using toilet paper rolls, seal one end with plastic wrap or aluminum foil and use an elastic to hold it over the end.) Set your molds aside until they look completely dry. Remove them from their molds and let them dry even more (about 24 hours). The bigger your molds, the longer it will take for your chalk to dry.
Rain Gauge
A rain gauge measures the amount of rain that falls. (A fun craft for rainy weather or spring.)
Materials needed to make your own rain gauge: a wide mouth jar, a short plastic ruler, and waterproof tape.
Stand the ruler inside the jar so that it touches the bottom. Tape it in place. Put the jar outside to collect rain. To see how much rain fell, check the ruler to measure how much rain is in your rain gauge. (You can do this with snow too.)
Tip: Place your wonderful, homemade rain gauge somewhere away from trees and buildings, so the rain can fall into your jar.
Raft
Big or little? Think small: Make a miniature homemade raft for a doll to use in the bathtub, or if you have the supplies and adult help, think big and create a raft big enough for you to use in the water. Don’t forget your life jacket and a paddle!
Birdhouse
You can find plans/kits for building your own birdhouse at your local hardware store, book store, library, or on the Internet. Or… even better… use your imagination to build a homemade birdhouse using supplies you have around the house, yard, and garage.
Make a Walking Stick
You will need a nice, long, strong, straight stick. A good height for a walking stick is a bit higher than your waist when it is touching the ground. This way, you can reach forward with your walking stick without having to hunch over as you walk. The stick also needs to be narrow enough that you can comfortably wrap your hand around it, but strong and straight enough that it doesn’t bend or break if you place weight on it.
Once you have found a good stick, remove the little sticks, twigs or leaves off the main, long stick. You can either use your walking stick the way it is, or put more work into it.
Smooth and shiny? Sand your walking stick smooth with sandpaper and coat it with polyurethane (available at paint and hardware stores) to make your walking stick smooth and to protect from water. Or, instead of polyurethane you can paint your stick to make it bright and colourful. Maybe even paint pictures of places you will hike with your stick.
Want it fancy? Tie or wrap ribbons or yarn to your homemade walking stick, or around it. What else can you do?
Looking for more? Try these places as well:
+ More Construction Projects From the Blog
Might I also suggest…
Never be bored again! All this website’s great content and MORE!
Affordably available in ebook from these online retailers:
Amazon US
Amazon UK
Amazon CA
Amazon AU
iBooks
Barnes and Noble
Kobo
Google


