Why is it Important to For Our Kids to Play With Their Food?
Have you played with your food today?
There’s still time!
Children looove to play with their food. It creates a sensory awareness that just can’t be matched by experimenting with anything else. But it’s not just food fights and making a volcano out of mashed potatoes and gravy… it can be so much more!
How about a little cooking with the kids to help teach them healthy eating habits and a little responsibility? Besides, cooking skills even if it’s only how to make a banana split are great to have. By the way, did you know that children who feel they have food choices are less likely to have food issues later in life? As well, they’ve recently learned that eating habits learned before kids hit school age are the most influential on determining obesity.
Enjoy!
These free play food activities are only the beginning. There are more activities on the It’s All Kid’s Play blog as well as tons and tons on Pinterest. And sometimes I share ideas on Twitter, too! Oh! And be sure to check out the book I wrote, too. It includes even more travel games as well as over 1,000 other play activities so no matter where you are and what your interests or age, there is something in there for you–guaranteed! Check it out!
Laugh Until Milk Comes Out Your Nose or Sprays Out Your Mouth
I totally got my brother across the table once. It’s his fault–he made me laugh. It’s not my fault I sprayed him with milk. Well, maybe it is, but the look on his face was priceless!
Make a Meal for Your Parents
Do you think you could make your way around cooking a meal? You can always start small with things like sandwiches. And of course, ask an adult to help with things like sharp knives, stoves, and the oven if you haven’t ‘graduated’ to using them yet.
Eat by Candlelight
Candles on the table are a nice way to make a meal feel completely different. My mom puts out candles for all the ‘big’ meals and dims the lights. It’s pretty cool! (And for some reason, it usually causes us to bring out our best manners too!)
Blow Bubbles in Your Drink
Yes! Bubbles! This one is a ton of fun and one of the reasons kids love drinking milk at our house!
Use a straw to blow piles and piles of bubbles in your drink. (Milk is great for bubbles!) See if you can make so many bubbles you can bring them right to the brim of your glass–without spilling over. Quick! Slurp them back up before they spill over!
Eat Something New
A friend is taking me to try sushi sometime soon. How about you? Are you going to try something new? You won’t know if you like it unless you try it! (Sometimes the most icky looking food is the yummiest. Kind of like… well, I can’t think of an example, but there must be something out there.) 😉
Have a Food Fight
(Don’t tell your parents I started it!)
P.S. Flinging peas with a spoon is the best, although mashed potatoes make a nice heavy, splat sound.
Draw a Secret Message on a Banana
Take one banana. One toothpick or something pointy. Now, draw! You can write a message or draw a picture on the surface of the banana peel by gently drawing onto it with your toothpick. In a few hours, where you drew will turn brown and your banana secret message will appear!
I’ve written secret messages on my daughter’s lunch banana, drawn arms, legs, and a face on the banana too! Your imagination is your only limitation.
Eat with Chopsticks
Can you do it? It’s tricky, isn’t it?
Bake Cookies
Hey, when you bake some cookies, call me and I’ll come right over and sample them for you! You know, just in case.
Suck Jell-o/Pudding/Soup Through Your Teeth
Are you missing teeth? You’ve got to try this. It feels soooo cool! (It’s still pretty cool even if you have all your teeth.)
Missing teeth? Stick your beverage straw in the gap! Tee hee. 🙂
Slurp Your Noodles
Sundaes and Banana Splits
 Making sundaes and banana splits is super easy. Add some yummy toppings like chocolate chips, chocolate/caramel/strawberry sauce, strawberries, bananas, sprinkles, nuts, and pancake syrup to your favourite ice-cream to create a sundae. (Just make sure you put it in a bowl, first, okay?) Oh! And don’t forget the cherry on top!
Want to make it a banana split? Slice a banana in half horizontally (the length of the banana) and pile the ice cream and toppings on top.

Homemade Dog Treats
Don’t leave your dog out of the fun! There are all sorts of homemade dog treat recipes to try out. Try searching for ‘homemade dog treats,’ ‘dog treat recipes’ or ‘dog biscuit recipes.’ Find a recipe that looks like your cup of tea and give it a go. Your dog will love them–and you!
Frozen Juice Treats
To make frozen juice treats, use an ice cube tray to make mini popsicles by pouring juice into the tray. Use toothpicks for sticks. Pop it in the freezer. In a few hours, you’ll have popsicles.
If you have a ready-made popsicle container, add juice and freeze.
Or, use popsicle sticks in mini yogurt containers.
Want to make it even fancier? Add fruit chunks.
Super-Easy Ice-Cream Recipe
To make one serving of homemade ice-cream, mix together in a small zip top bag:
125 mL (½ cup) half-and-half cream
1 mL (¼ tsp) vanilla
15 mL (1 tbsp) white granulated sugar
Press the air out of the bag and seal it.
Half fill a large zip top bag with ice and 30 mL (2 tbsp) coarse salt. Stir the salt so that it coats the ice. Put the small bag in the big bag. Squeeze the air out and seal the bag.
Now comes the fun part!! Jiggle, squeeze, and toss the bag for ten minutes. Brrrrr…you might need your winter gloves!
Ta-da! You now have homemade, soft ice-cream!
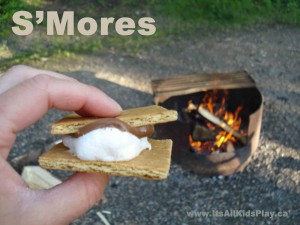
S’mores
 Ingredients: arrowroot cookies or graham crackers, chocolate chips or pieces of chocolate, marshmallows. (Want to skip a step? Use cookies that have a layer of chocolate on one side. Now all you need is a toasted marshmallow.)
Campfire S’More Method: Place your piece of chocolate on your cookie. Now, toast your marshamallow over your campfire’s coals. When it is warm and a bit gooey, carefully place it on top of the chocolate (careful, it is very hot and can burn your fingers). Add another cookie on top to make a ‘sandwich.’ Mmmmm. Yum! Watch out, they are messy goodness.
Microwave S’More Method: Put a cookie on a plate and place your chocolate on top. Place a marshmallow on top of the chocolate. Heat in the microwave for a few seconds until the marshmallow starts to get puffy. Take it out of the microwave and add another cookie on top. Push down lightly, let it cool and enjoy. Careful! They can be very hot.
Milkshake
To make a milkshake, mix ice cream or frozen yogurt in a blender along with a banana as well as other frozen or fresh fruit. You may have to add a little bit of milk or soy milk to make it less thick. Enjoy!
Peanut Butter Ball Recipe
Allergy Alert!
Ingredients:
250 mL (1 cup) peanut butter
80 mL (2/3 cup) powdered milk
60 mL (¼ cup) coconut
125 mL (½ cup) raisins
60 mL (¼ cup) honey
Mix all the ingredients together. Make small balls or other shapes and enjoy! (You can freeze these treats too.) Yum!
Cookies in a Jar
Cookies in a jar is a great homemade gift idea for teachers, friends, and other people in your life.
Pull out your favourite cookie recipe, a large sealer jar (you can also use a spaghetti sauce jar or other large jar), pen, paper, ribbon… and suddenly you are on your way to a lovely gift.
First, make sure your recipe’s dry ingredients will fit in the jar you have chosen. To do that, use your math skills. Add up (on paper) all the dry ingredients (flour, sugar, chocolate chips, etc.–NOT eggs, butter, etc. You only want to put the ingredients that will not go bad into the jar. Don’t worry about the ‘wet’ ingredients right now). What do your wet ingredients add up to? Swap that number for water. So, if you have 3 cups of dry ingredients, pour 3 cups of water into your jar. If it fits, your dry ingredients will fit. (It’s okay to have a little extra room at the top, but you don’t want too much or the ingredient layers get all jumbled and it doesn’t look as cool.)
Layer the dry ingredients, one at a time, into the jar. It looks really cool if you have ingredients like chocolate chips and brown sugar because they make coloured layers.
Put the lid on nice and tight and tie some ribbon around the jar’s neck to pretty it up. Write the cookie’s baking instructions on a piece of paper (or a nice tag that you can attach to the ribbon). Do they need to add an egg, vanilla, butter? Write that on the tag. The idea is that all they will need to do is add the wet ingredients to your jar’s mix and they will be ready to bake cookies!
Hint: If you don’t have large sealer jars, you might be able to find some at a second hand store.
Looking for more? Try …
Might I also suggest this time-saver…
Never be bored again! All of this website’s great content and MORE!
Affordably available in ebook from these online retailers:
Amazon US
Amazon UK
Amazon CA
Amazon AU
iBooks
Barnes and Noble
Kobo
Google


